The System Workflow section describes how VR-Inventa operates from start to finish, outlining the step-by-step process users follow to perform key tasks within the system. It provides a clear view of the flow of operations, from logging in to managing sales, inventory, purchases, accounts, and reporting.
This section helps users understand how the system works, how data moves through different modules, and how daily operations are managed efficiently.
1 Dashboard
The Dashboard is the central hub of VR-Inventa, providing a real-time overview of business operations. After signing in, you are directed to the Dashboard, where you can quickly view key information about your system activities. Use the hamburger menu to navigate to other sections, review the inventory summary showing figures such as revenue and returns, and monitor performance through charts, recent transactions, and best-selling items. Access the Settings menu from the top-right corner to manage system preferences.
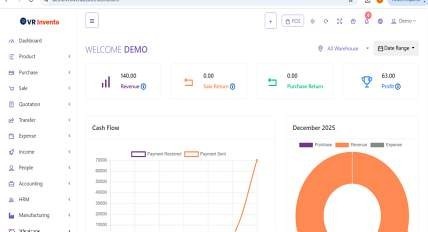
Dashboard Overview
2 Settings
The next thing to do after signing in and seeing the dashboard is to navigate to settings and select general settings. Here, you can set up your business details, including the system title, logo, favicon, VAT registration number, time zone, company name, currency and its position, staff access, invoice and date formats, default profile margin, parking slip options, app key, and barcode. Once you have updated the information, click Submit to apply the changes, and the system will update to reflect your business settings.
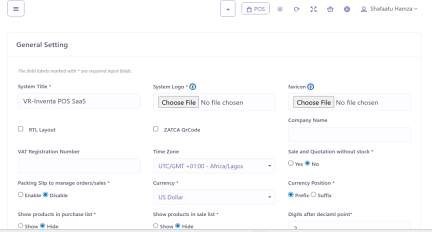
General Settings - Part 1
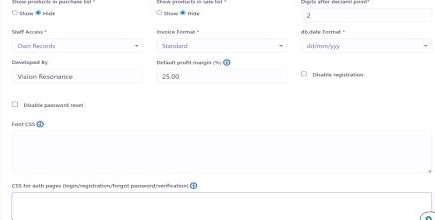
General Settings - Part 2

General Settings - Part 3
3 User Profile
To update your profile, navigate to User Profile under Settings. Here, you can set or update your username, email, phone number, company name, and password by entering your current password, new password, and confirming it. After making the changes, click Submit to save and update your profile.
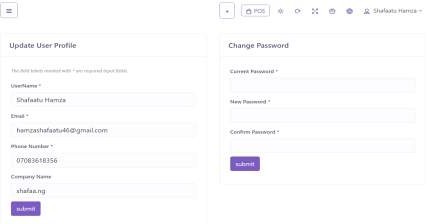
User Profile Settings
4 Product - Category
Go to Category under Product to manage your product categories. Click Add Category to create a new category. You can search existing categories, select how many records to display per page, and use the Action button next to each category to edit or delete it.
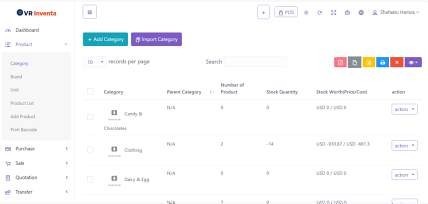
Product Category Management
5 Product - Brand
Navigate to Brand under Product to manage product brands. Click Add Brand or Import Brand to add new entries. You can search brands, adjust records per page, and use the Action button to edit or delete a brand.
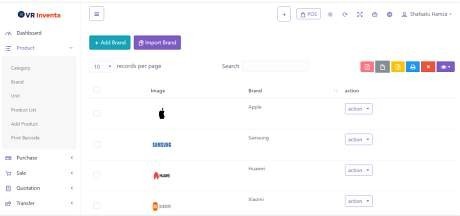
Product Brand Management
6 Product - Unit
In Unit, you can manage product units. Click Add Unit or Import Unit to create new units. Use the search bar to find units, and the Action button allows you to edit or delete any unit.
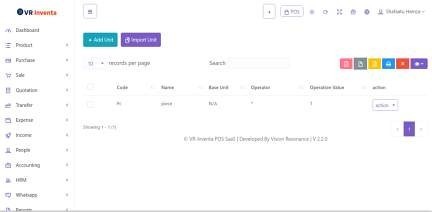
Product Unit Management
7 Product - Product List
The Product List shows all products in your system. Use the Add Product or Import Product buttons to add new items. You can filter and search products, view all in-stock items, and check details such as brand, category, quantity, unit, price, cost, and stock. You can also export the list to PDF or Excel for reporting.
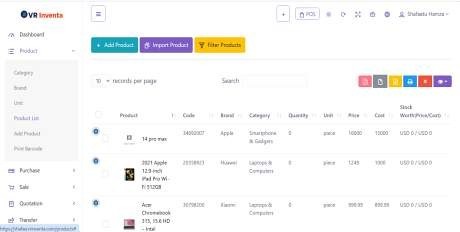
Product List View
8 Product - Add Product
Go to Add Product to enter a new product. Select the product type, enter the product name, and generate a product code automatically. Fill in details like barcode symbology, brand, category, units, pricing, cost, profit margin, taxes, stock, product image, warranty, and variants if applicable. You can also enable online sales, batch and expiry dates, and add product tags, meta title, and description for SEO. Click Add Product to save it.
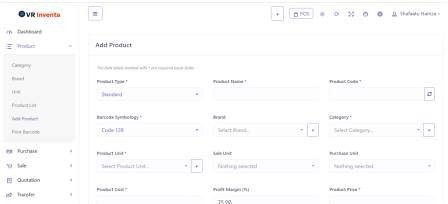
Add Product Form - Part 1
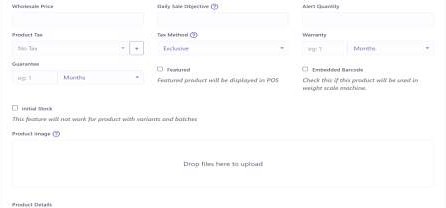
Add Product Form - Part 2
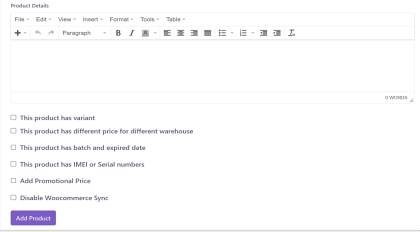
Add Product Form - Part 3
9 Product - Print Barcode
In Print Barcode, select the product code you want to print. Choose the information to display on the label, such as product name, price, promotional price, business name, and brand. Select the paper size and click Submit to generate the barcode labels.
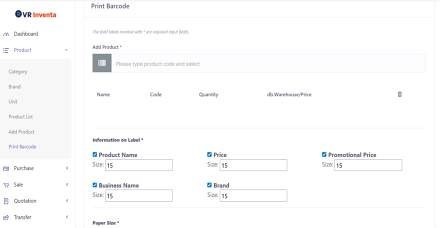
Barcode Printing Interface
10 Product - Adjustment List
Go to Adjustment List to view previous stock adjustments. Click Add Adjustment to create a new adjustment record.
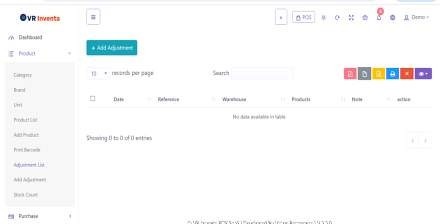
Stock Adjustment List
11 Product - Add Adjustment
In Add Adjustment, select the warehouse, attach any relevant documents, and choose the products to adjust. Fill in details in the order table including product name, code, unit, cost, quantity, action, and notes. Click Submit to save the adjustment.
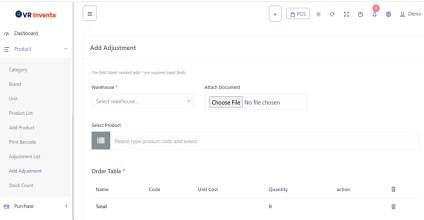
Add Stock Adjustment Form
12 Product - Stock Count
Use Stock Count to perform inventory counting. Select the warehouse, category, and brand, then click Submit. The system will list products for counting, allowing you to update stock levels accurately.
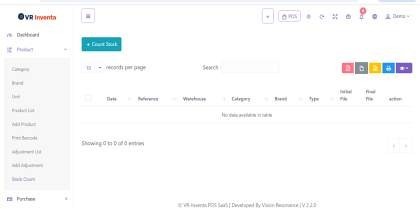
Stock Count Interface
13 Purchase - Purchase List
Go to Purchase List under Purchase to manage all purchases. Use the Add Purchase or Import Purchase buttons to create new entries, delete purchases, or filter the list. You can also search purchases to quickly find specific records.
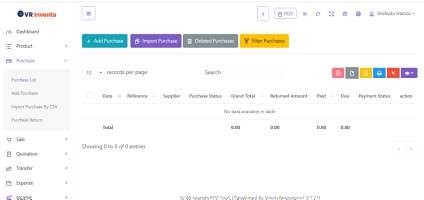
Purchase List View
14 Purchase - Add Purchase
In Add Purchase, fill in the date, reference number, warehouse, supplier, purchase status, attached documents, currency, and exchange rate. Select the products, fill out the order table, and include order tax, discount, shipping cost, and payment status. Click Submit to save the purchase.
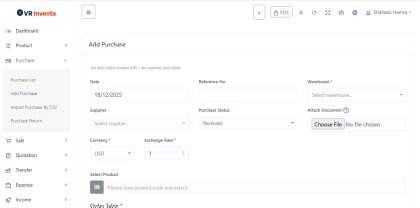
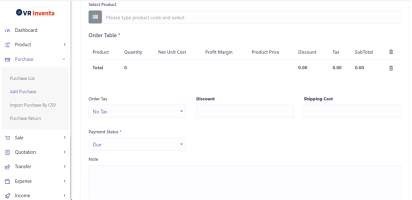
Add Purchase Form
15 Purchase - Import Purchase by CSV
Use Import Purchase by CSV to bulk add purchases. Select the warehouse and supplier, set the purchase status, attach relevant documents, and upload the CSV file. You can also download a sample CSV file for reference. Include order tax, discount, and shipping cost, then click Submit to complete the import.
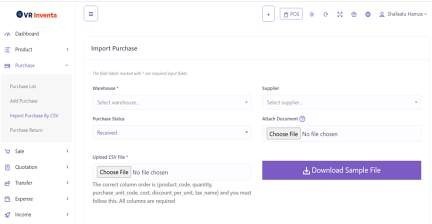
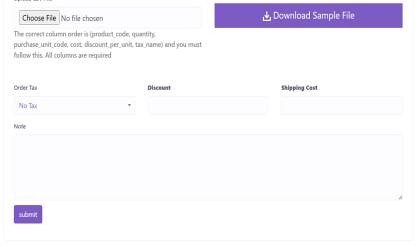
Import Purchase by CSV
16 Purchase - Purchase Return
In Purchase Return, record returned items from customers. Select the warehouse, enter the date of purchase and return, and view the list of returned items. You can also use the search bar to quickly find specific returns.
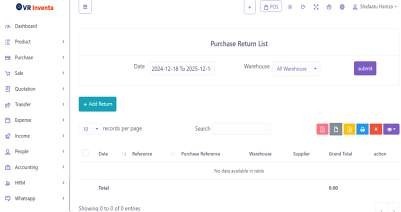
Purchase Return Management
17 SALE - Sale List
Go to Sale List to manage all sales. Click Add Sale or Import Sale to create new entries, delete sales, or filter the list. Use the search bar to quickly find sales. For each sale, the Action button allows you to view, edit, view payment, add return, send SMS, send invoice to WhatsApp, add delivery, delete, or generate invoice.
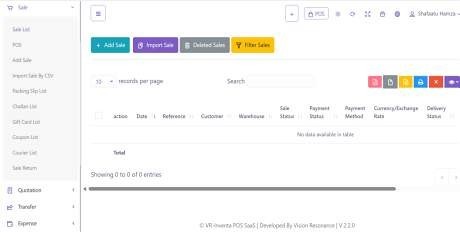
Sale List View
18 SALE - POS
The POS (Point of Sale) displays the checkout screen, showing the grand total, date, warehouse, biller, and customer details. Here, you can process payments via cash, card, or multiple payment methods, draft or cancel the sale, and view recent transactions. Product categories, brands, and items are also displayed for easy selection.
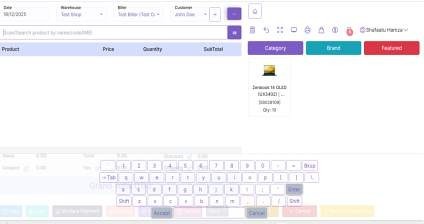
Point of Sale Interface
19 SALE - Add Sale
In Add Sale, enter the date, reference number, customer, warehouse, biller, currency, and exchange rate. Select products and fill the order table, including order tax, discounts, shipping cost, attached documents, sales status, payment status, sale notes, staff notes, and whether installment payment is used. Click Submit to save the sale.
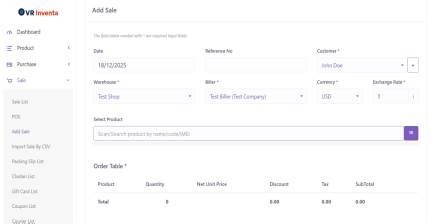
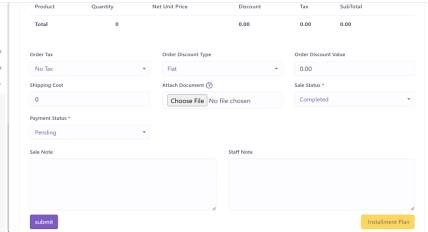
Add Sale Form
20 SALE - Import Sale by CSV
Use Import Sale by CSV to bulk add sales. Select the customer, warehouse, and biller, upload the CSV file, or download a sample file for reference. Include order tax, discount, shipping cost, attached documents, sales status, sale notes, and staff notes, then click Submit.
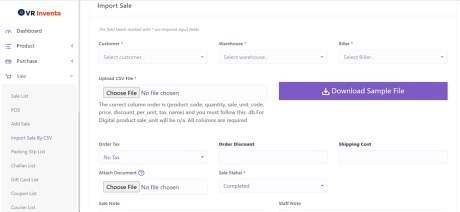
Import Sale by CSV
21 SALE - Packing Slip List
In Packing Slip List, you can view all packing slips, create a Challan, and search for specific records.
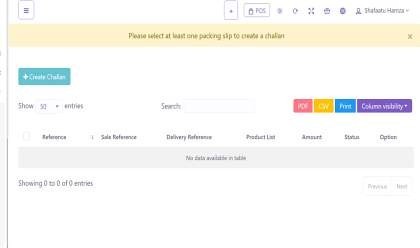
Packing Slip List
22 SALE - Challan List
The Challan List allows you to manage delivery challans. Select the courier and filter by status (active or closed), then submit to view the list. A search bar is available to quickly find specific challans.
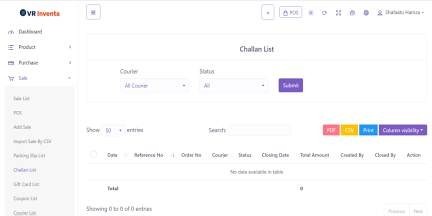
Challan List View
23 SALE - Delivery List
In Delivery List, view all deliveries and use the search bar to locate specific records.
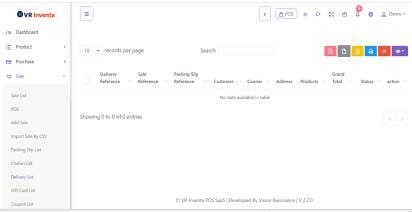
Delivery List View
24 SALE - Gift Card
Go to Gift Card to create new gift cards and view the list of all gift cards. Use the search bar to find specific cards.
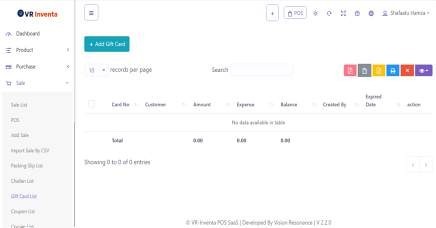
Gift Card Management
25 SALE - Coupon List
In Coupon List, add new coupons and view existing ones. A search bar is available for quick access.
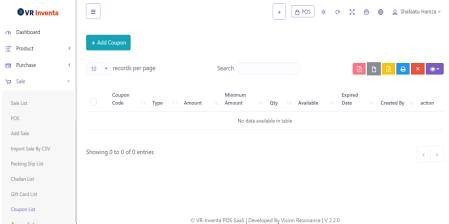
Coupon List View
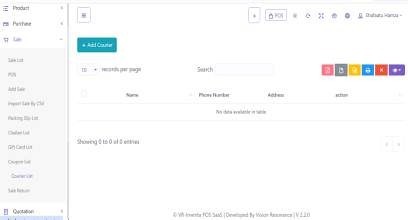
26 SALE - Courier List
In Courier List, add new couriers and view all existing entries. Use the search bar to find specific couriers.
Courier List View
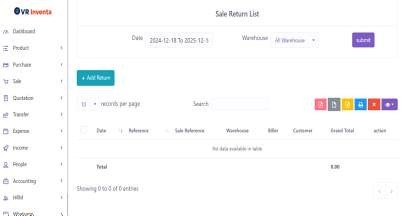
27 SALE - Sale Return
In Sale Return, record returned items from customers. Select the date and warehouse, add returns, and view the list of returned sales. A search bar is available to quickly locate specific returns.
Sale Return Management
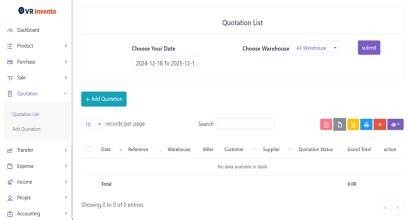
28 Quotation - Quotation List
Go to Quotation List to manage all quotations. Click Add Quotation to create a new quotation, use the search bar to find existing quotations, and view the list of all quotations.
Quotation List View
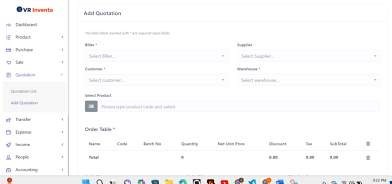
29 Quotation - Add Quotation
In Add Quotation, select the biller, supplier, customer, and warehouse, then choose the products. Complete the order table by entering order tax, discount, shipping cost, status, attached documents, and notes, then click Submit to save the quotation.
Add Quotation Form
30 Transfer - Transfer List
Go to Transfer List to manage all product transfers. Click Add Transfer to create a new transfer, use the search bar to find existing transfers, and view the list of all transfers.
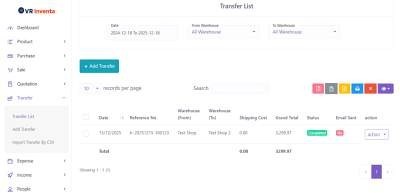
Transfer List View
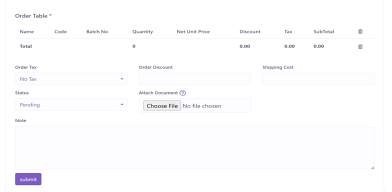
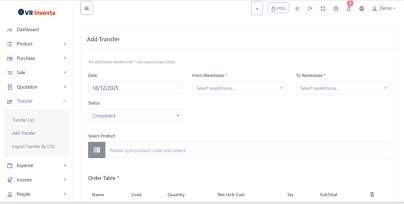
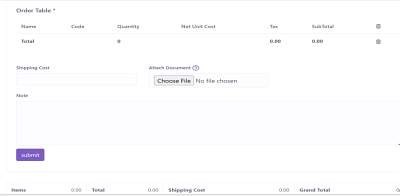
31 Transfer - Add Transfer
In Add Transfer, enter the date, select the from warehouse and to warehouse, and choose the transfer status (completed or pending). Select the products, complete the order table, add shipping cost and attach any documents, then click Submit to save the transfer.
Add Transfer Form
32 Transfer - Import Transfer by CSV
Use Import Transfer by CSV to bulk add transfers. Select the from warehouse and to warehouse, set the transfer status, upload the CSV file, or download a sample file for reference. Add shipping cost, attach documents if needed, and click Submit to complete the import.
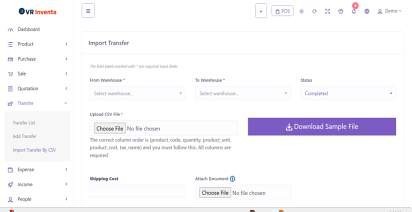
Import Transfer by CSV
33 Expense - Expense Category
Go to Expense Category to manage expense categories. Click Add Expense Category or Import Expense Category to create new categories, use the search bar to find existing ones, and view the list of all expense categories.
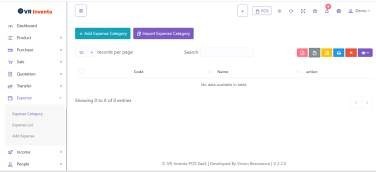
Expense Category Management
34 Expense - Expense List
In Expense List, view and manage all recorded expenses. You can add expenses, search records, filter by date and warehouse, then submit to display the results.
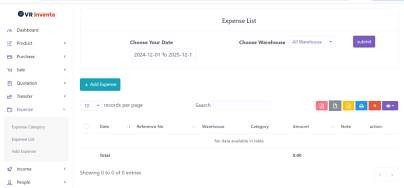
Expense List View
35 Expense - Add Expense
Use Add Expense to record a new expense. Enter the date, select the expense category and warehouse, input the amount, and click Submit to save the expense.
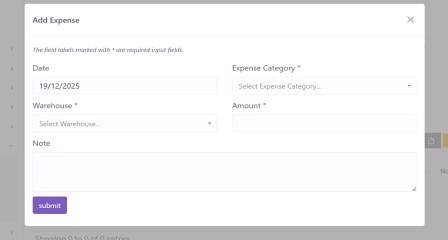
Add Expense Form
36 Income - Income Category
Go to Income Category to manage income categories. Click Add Income Category to create new categories, use the search bar to find existing ones, and view the list of all income categories.
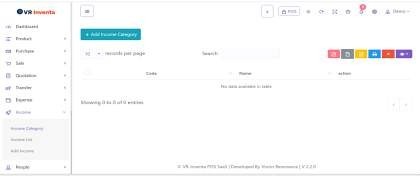
Income Category Management
37 Income - Income List
In Income List, view all recorded income entries. You can add income, use the search bar to find records, and see the list of all income transactions.
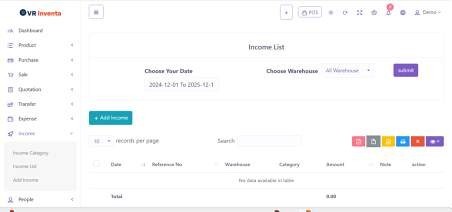
Income List View
38 Income - Add Income
Use Add Income to record new income. Enter the date, select the income category and warehouse, input the amount, choose the account, add a note if required, and click Submit to save the income.
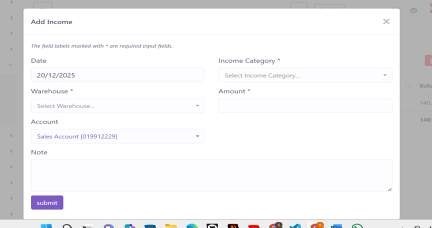
Add Income Form
39 People - Customer List
Go to Customer List to manage customers. Click Add Customer or Import Customer to create new records, use the search bar to find customers, and view the list of all customers with their details. Use the Action button to edit or delete customer records.
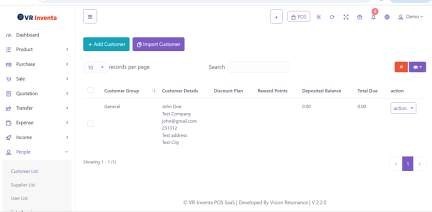
Customer List View
40 People - Supplier List
In Supplier List, you can add or import suppliers, search existing records, and view the list of all suppliers. The Action button allows you to edit or delete supplier details.

Supplier List View
41 People - User List
Use User List to manage system users. Click Add User to create a new user, search existing users, and view user details such as email and company name. You can edit or delete users using the Action button.
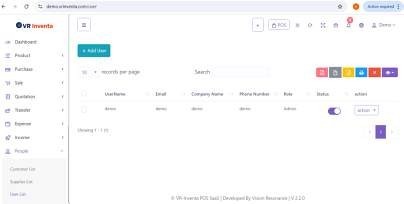
User List View
42 People - Sale Agent
Go to Sale Agent to manage sales agents. You can add new sales agents, search existing ones, and view the list of all agents. Use the Action button to edit or delete agent records.
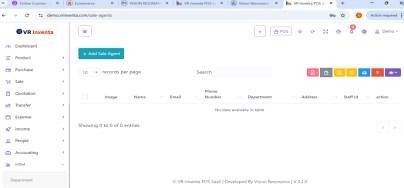
Sale Agent Management
43 People - Biller List
In Biller List, add or import billers, search existing billers, and view the complete list. The Action button allows you to edit or delete biller information.
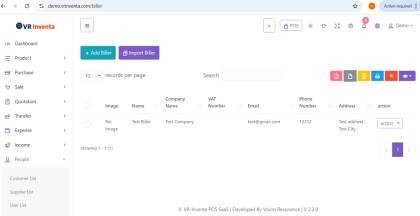
Biller List View
44 Accounting - Account List
Go to Account List to manage accounts. Click Add Account to create a new account, enable or disable accounts as needed, use the search bar to find records, and manage accounts using the Action button to edit or delete them.
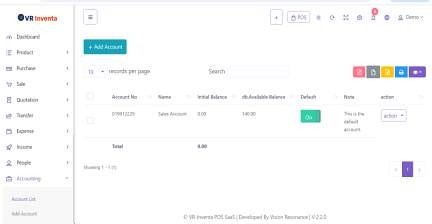
Account List View
45 Accounting - Add Account
In Add Account, enter the account number, account name, initial balance, and notes, then click Submit to create the account.

Add Account Form
46 Accounting - Money Transfer
Use Money Transfer to manage transfers between accounts. You can add a new transfer, search existing transfers, view the list, and use the Action button to edit or delete transfer records.
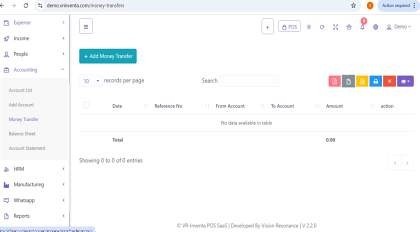
Money Transfer Management
47 Accounting - Balance Sheet
In Balance Sheet, view a summary of all financial records. You can review the balance sheet and use the search option to filter records as needed.
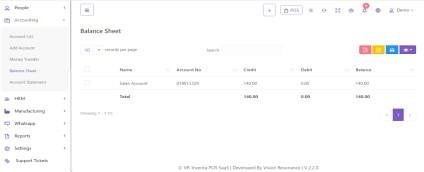
Balance Sheet View
48 Accounting - Account Statement
Go to Account Statement to view detailed account transactions. Select the account, choose the transaction type (all, debit, or credit), set the date range, and click Submit to generate the statement.

Account Statement View
49 HRM - Department
Go to Department to manage departments. Click Add Department to create a new department, use the search bar to find records, and view the list of all departments. Use the Action button to edit or delete departments.
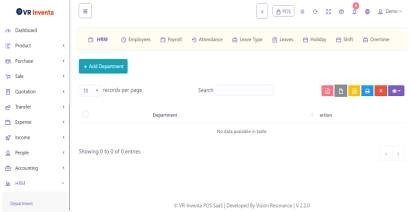
Department Management
50 HRM - Designation
In Designation, you can add new designations, search existing ones, and view the list of all designations. The Action button allows you to edit or delete designation records.
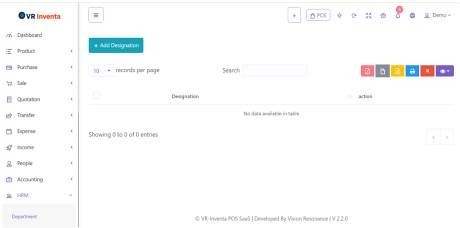
Designation Management
51 HRM - Employee
Use Employee to manage staff records. Click Add Employee to add a new employee, search existing employees, and view the list of all employees. Use the Action button to edit or delete employee details.
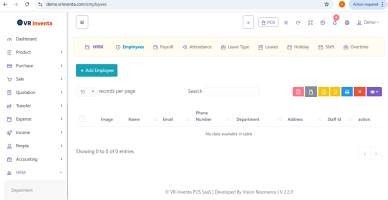
Employee Management
52 HRM - Attendance
Go to Attendance to manage staff attendance. You can add attendance, import attendance by CSV, filter records, search entries, and view the list of attendance records.
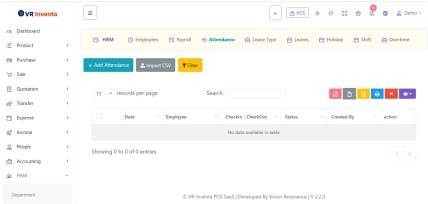
Attendance Management
53 HRM - Holiday
In Holiday, add new holidays, search existing ones, and view the list of all holidays. Use the Action button to edit or delete holiday records.
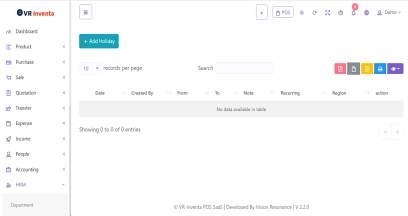
Holiday Management
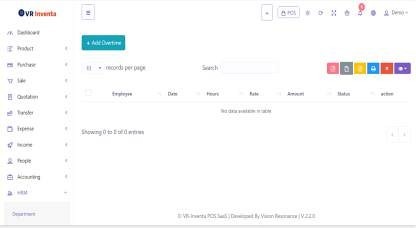
54 HRM - Overtime
Use Overtime to manage overtime records. Click Add Overtime, search existing entries, view the list, and use the Action button to edit or delete overtime records.
Overtime Management
55 HRM - Leave Type
Go to Leave Type to define leave categories. You can add leave types, search existing ones, and manage them using the Action button.
Leave Type Management
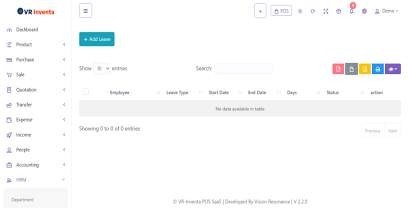
56 HRM - Leave List
In Leave List, add new leave requests, search records, and view the list of all leave entries. Use the Action button to manage leave records.

Leave List View
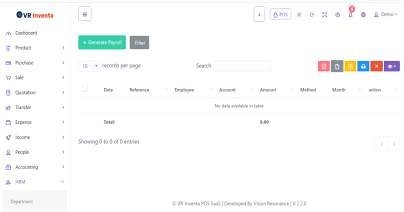
57 HRM - Payroll
Use Payroll to generate employee payroll. You can filter and search payroll records, view the list, and manage entries using the Action button.
Payroll Management
58 Manufacturing - Production List
Go to Production List to manage all production records. Select the date, warehouse, and production status to filter records, add new production, search existing entries, and view the complete list. Use the Action button to manage individual production records.
Production List View
59 Manufacturing - Add Production
In Add Production, enter the date, select the warehouse, set the production status, and attach relevant documents. Choose a recipe, specify the total quantity, review the ingredient list, add production cost, shipping cost, and notes, then click Submit to add the production record.
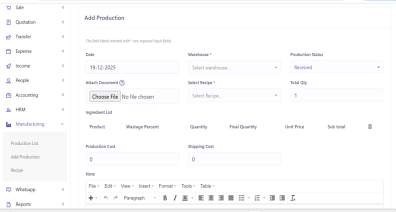
Add Production Form
60 Manufacturing - Recipe
Use Recipe to manage product recipes. Click Add Recipe to create a new recipe, search products, view all products in stock, and manage recipes using the Action button to edit or delete entries.
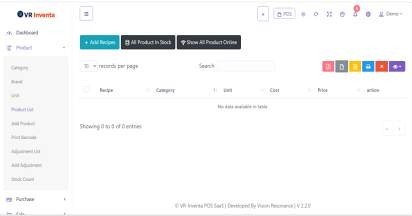
Recipe Management
61 WhatsApp - WhatsApp Settings
Go to WhatsApp Settings to configure WhatsApp integration. Enter the permanent access token, phone number ID, and business account ID, then click Submit to save the settings.
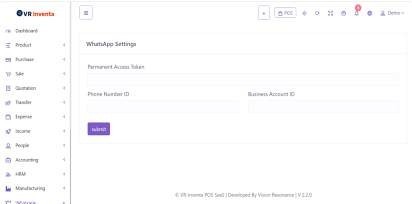
WhatsApp Settings
62 WhatsApp - Message Templates
In Message Templates, view and manage all message templates. You can search templates, view the list, and use the Action button to edit or delete templates.
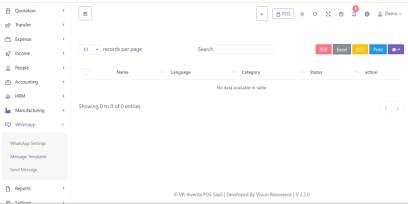
Message Templates Management
63 WhatsApp - Send Message
Use Send Message to communicate with customers. Select the receiver and message template, enter the message content, attach an image or document if needed, and click Send to deliver the message.
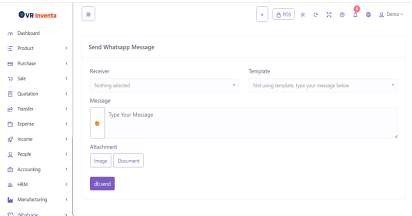
Send Message Interface
64 Reports - Activity Log
Go to Activity Log to view all system activities. Use the search bar to quickly find specific records.
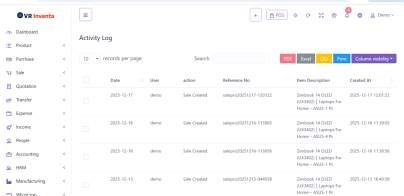
Activity Log View
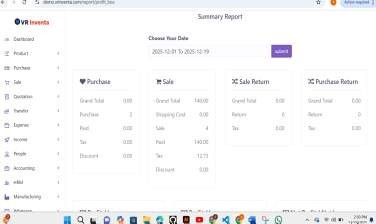
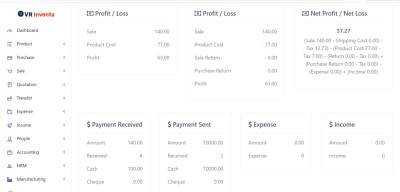
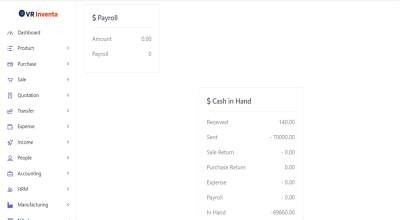
65 Reports - Summary Report
In Summary Report, select the date range and click Submit to view a summary including purchase, sale, sale return, purchase return, profit or loss, net profit or loss, payments received and sent, expense, income, payroll, and cash in hand.
66 Reports - Bestseller
View the Bestseller chart by selecting either all warehouses or a specific warehouse to see top-selling products.
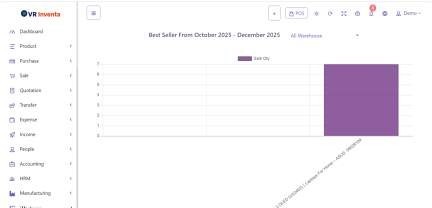
Bestseller Chart
67 Reports - Product Report
In Product Report, choose the date range and warehouse, then click Submit to see a detailed list of all products.
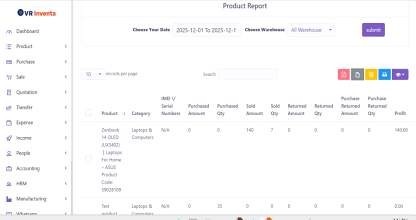
Product Report View
68 Reports - Daily Sale
Select a warehouse or all warehouses to view daily sales. The system displays the complete daily sale list.
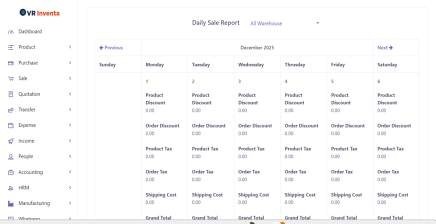
Daily Sale Report
69 Reports - Monthly Sale
View monthly sales in a chart format from January to December.
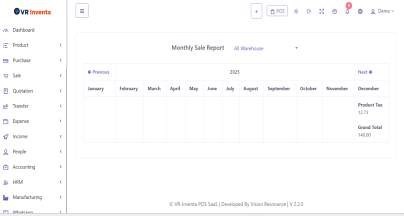
Monthly Sale Chart
70 Reports - Daily Purchase
Select the warehouse or all warehouses to see a list of daily purchases.
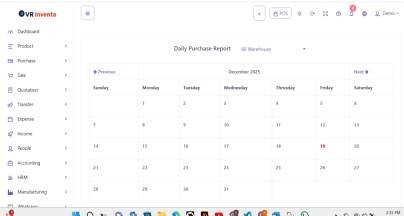
Daily Purchase Report
71 Reports - Monthly Purchase
View monthly purchases by selecting the warehouse and month.

Monthly Purchase Report
72 Reports - Sale Report
Generate sale reports by selecting the date range and warehouse, then click Submit.
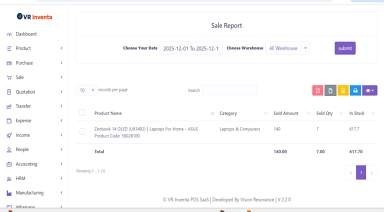
Sale Report View
73 Reports - Chalan Report
In Chalan Report, select the created date range, then click Submit to view all challans.
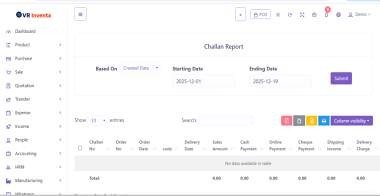
Chalan Report View
74 Reports - Sale Report Chart
View sale reports in chart form by selecting the date range, warehouse, time period, and product list, then click Submit.
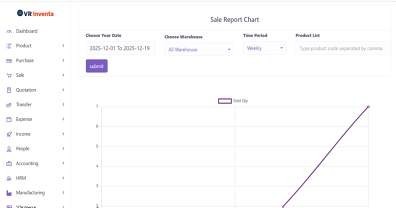
Sale Report Chart
75 Reports - Payment Report
Select the date range to view all payments received and sent.
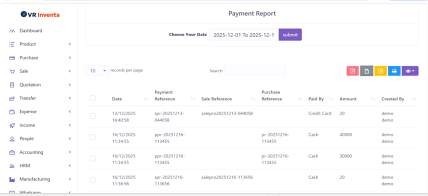
Payment Report View
76 Reports - Purchase Report
Generate purchase reports by selecting the date range and warehouse, then click Submit.
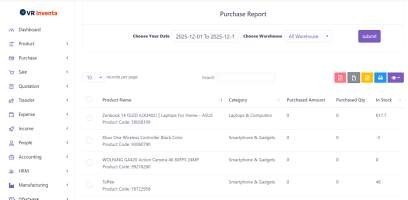
Purchase Report View
77 Reports - Customer Report
Select a customer and click Submit to view detailed reports for that customer.
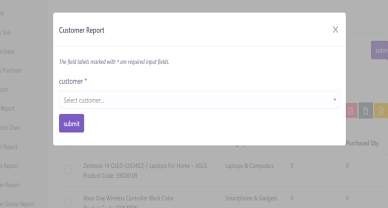
Customer Report View
78 Reports - Customer Group Report
Select a customer group, then click Submit to view the report.
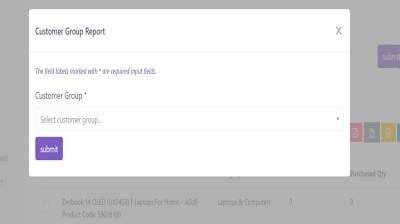
Customer Group Report View
79 Reports - Customer Due Report
Choose the date range to view customer dues. You can also use the search bar to find specific entries.
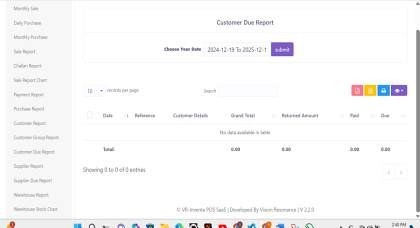
Customer Due Report View
80 Reports - Supplier Report
Select a supplier and click Submit to view detailed supplier reports.
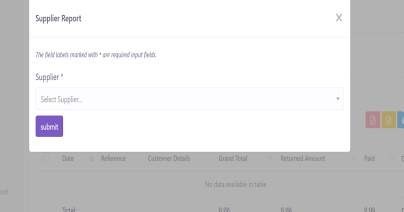
Supplier Report View
81 Reports - Supplier Due Report
Choose the supplier and date range, then click Submit to view all supplier dues.
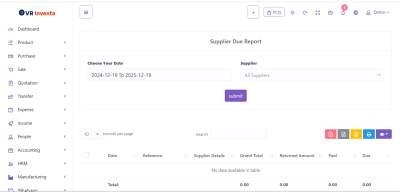
Supplier Due Report View
82 Reports - Warehouse Report
Select a warehouse and click Submit to see the warehouse report.
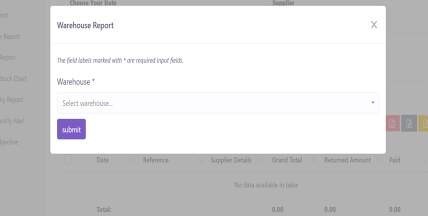
Warehouse Report View
83 Reports - Warehouse Stock Chart
View the stock chart for a specific warehouse.
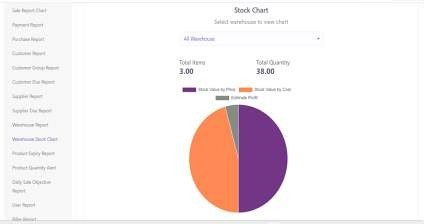
Warehouse Stock Chart
84 Reports - Product Expiry Report
See a list of all products nearing expiry.
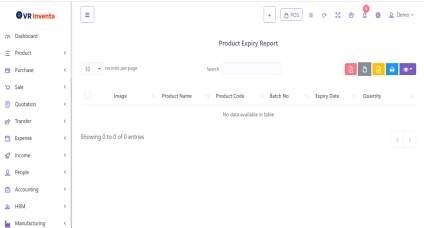
Product Expiry Report
85 Reports - Product Quantity Alert
View products that have reached or are below the minimum quantity threshold.
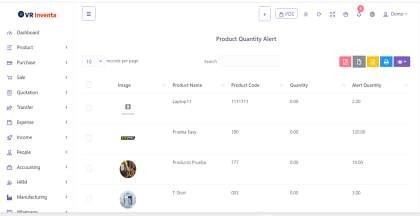
Product Quantity Alert
86 Reports - Daily Sale Objective
Select the date and click Submit to see the daily sales objectives.
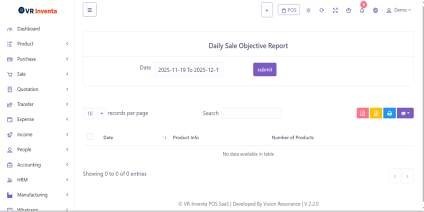
Daily Sale Objective View
87 Reports - User Report
Select a user and click Submit to view their activity and sales report.

User Report View
88 Reports - Biller Report
Select a biller and click Submit to view their detailed report.
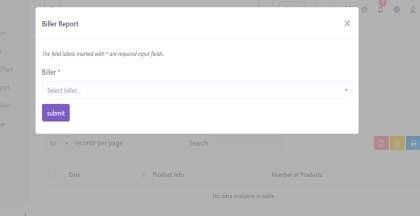
Biller Report View
89 Reports - Cash Register
Use Cash Register to search and view all cash register transactions.
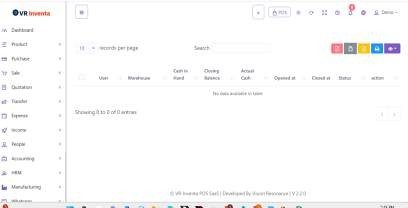
Cash Register View
90 Settings - Receipt Printers
Go to Receipt Printers to manage printers. Click Add Printer, search existing printers, view the list, and use the Action button to edit or delete printers.
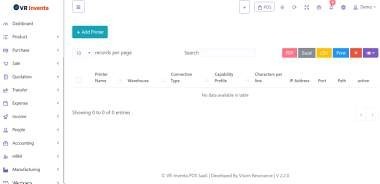
Receipt Printers Management
91 Settings - Invoice Settings
In Invoice Settings, add a new invoice format, set a default, and use the Action button to update or delete existing settings.
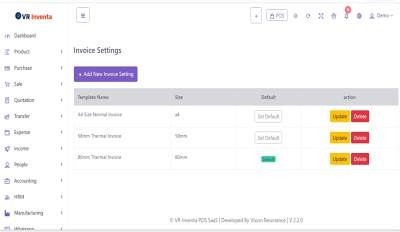
Invoice Settings
92 Settings - Role Permission
Use Role Permission to create roles, search existing roles, and manage them using the Action button to edit or delete.
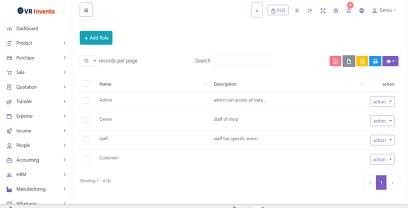
Role Permission Management
93 Settings - SMS Template
In SMS Template, add new templates, search existing ones, and manage them using the Action button to edit or delete.
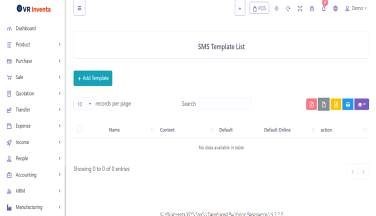
SMS Template Management
94 Settings - Custom Field List
Use Custom Field List to create custom fields, search existing ones, and use the Action button to edit or delete fields.
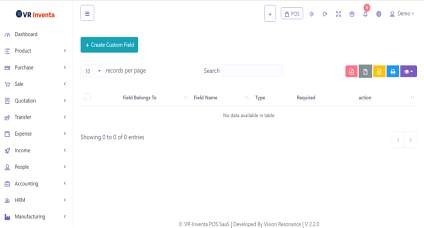
Custom Field List
95 Settings - Discount Plan
In Discount Plan, create discount plans, search existing plans, and manage them using the Action button to edit or delete.
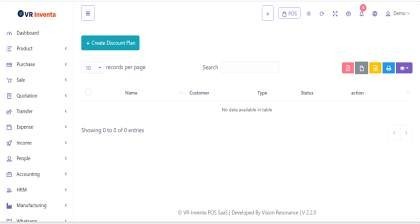
Discount Plan Management
96 Settings - Discount
Use Discount to create discounts, search existing discounts, and manage them using the Action button to edit or delete.
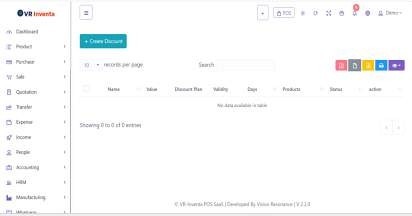
Discount Management
97 Settings - All Notifications
View All Notifications to see the complete notification list. Use the search bar to find specific notifications.
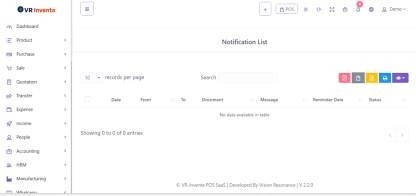
All Notifications View
98 Settings - Send Notification
In Send Notification, select the user, set a reminder, attach documents, enter the message, and click Submit to send the notification.
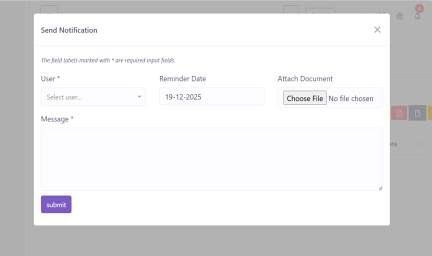
Send Notification Interface
99 Settings - Warehouse
Manage warehouses in Warehouse. Add new warehouses or import them, search records, view the list, and use the Action button to edit or delete.
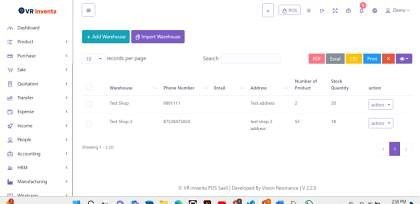
Warehouse Management
100 Settings - Tables
In Tables, add new tables, search existing ones, view the list, and manage entries using the Action button.
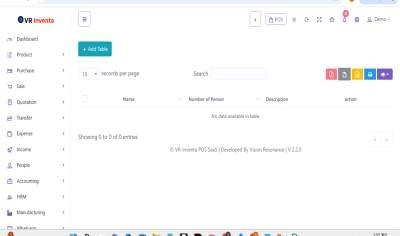
Tables Management
101 Settings - Customer Group
Use Customer Group to add or import groups, search records, view the list, and edit or delete entries using the Action button.
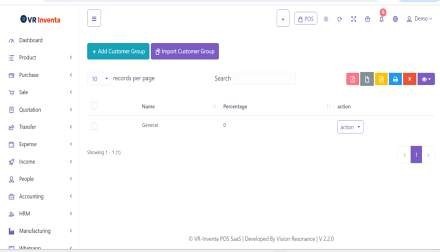
Customer Group Management
102 Settings - Currency
Manage Currency settings. Add new currencies, search, and use the Action button to edit or delete currencies.
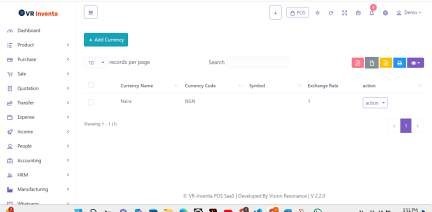
Currency Management
103 Settings - Tax
In Tax, add new taxes or import them, search existing records, and manage them using the Action button to edit or delete.
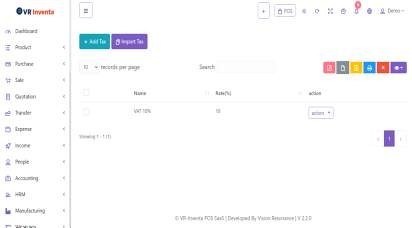
Tax Management
104 Settings - Create SMS
Use Create SMS to send messages. Select the template, enter the customer name or mobile number, add the mobile number and message, then click Send SMS.
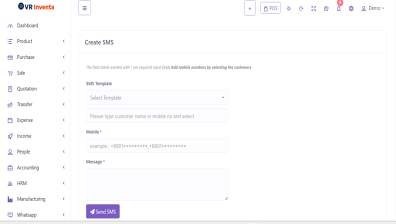
Create SMS Interface
105 Settings - Mail Setting
In Mail Setting, configure the mail driver, host, port, mail address, mail from name, username, password, and encryption, then click Submit.

Mail Setting Configuration
106 Settings - Reward Point Setting
Manage Reward Points by activating the system, setting sold amount per point, minimum sold amount to earn points, point expiry, duration and type, and redeem point settings, then click Submit.
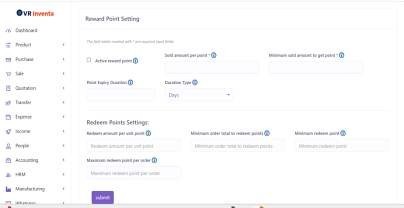
Reward Point Setting
107 Settings - SMS Setting
Configure the SMS gateway, set default options, and click Submit.
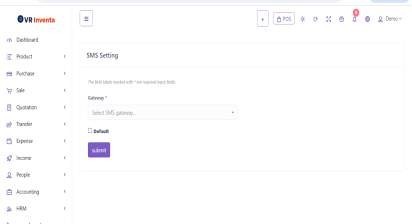
SMS Setting Configuration
108 Settings - Payment Gateways
Manage Payment Gateways like PayPal, Stripe, Moneypoint, Paystack, and Zendit. Select the gateway, choose whether it's for POS, e-commerce, or both, then click Submit.
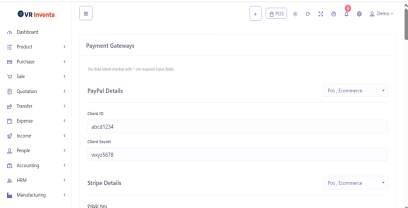
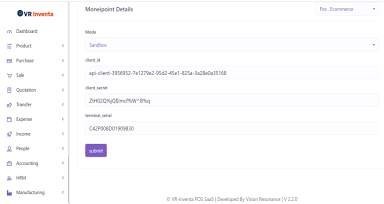
Payment Gateways Configuration
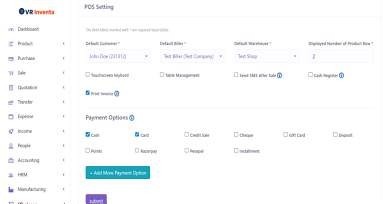
109 Settings - POS Settings
In POS Settings, select the default customer, biller, and warehouse, set the number of displayed products, enable touch screen keyboard, table management, SMS after sale, cash register, and choose payment options (cash, card, credit sale, check, gift card, deposits, points, installment, etc.). Add more payment options if needed, then click Submit.
POS Settings Configuration
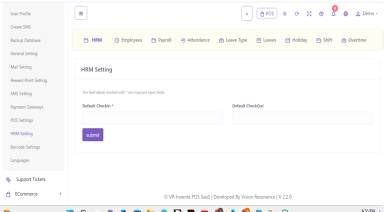
110 Settings - HRM Setting
Set the default check-in and check-out times for employees, then click Submit.
HRM Setting Configuration
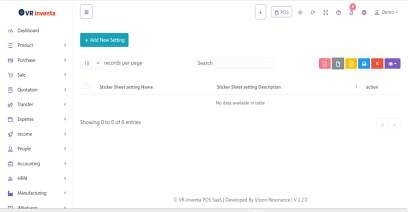
111 Settings - Barcode Settings
In Barcode Settings, add new barcode settings, view the list, and use the Action button to edit or delete.
Barcode Settings
112 Settings - Language
Manage system languages. Select the default language, add new languages, and manage translations as needed.
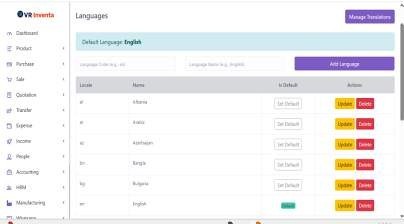
Language Management
113 Support Tickets
Go to Create Ticket to manage support requests. You can create a new ticket, search existing tickets, view the ticket list, and use the Action button to delete or manage tickets.
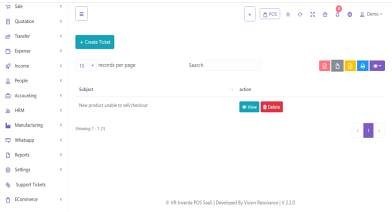
Support Tickets Management
114 E-Commerce - Sliders
Go to Sliders to manage website sliders. You can add a slider, view images, and use the Action button to delete existing sliders.
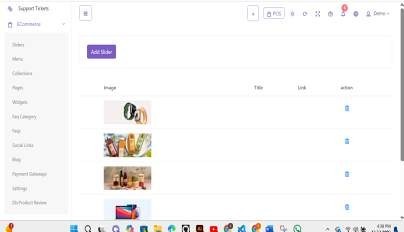
Sliders Management
115 E-Commerce - Menu
In Menu, add new menu items, search existing menus, and use the Action button to edit or delete entries.
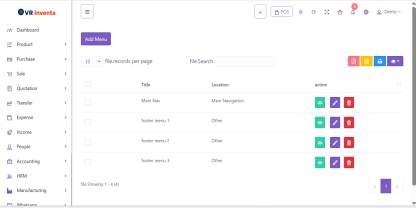
Menu Management
116 E-Commerce - Collections
Use Collections to manage product collections. You can add collections, search records, and use the Action button to edit or delete.
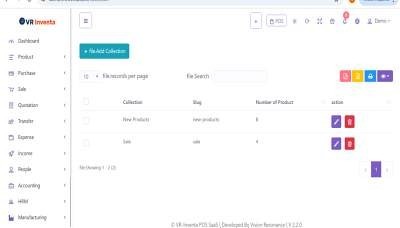
Collections Management
117 E-Commerce - Pages
In Pages, add new pages, search existing ones, and view all active pages. Use the Action button to edit, delete, or update pages.
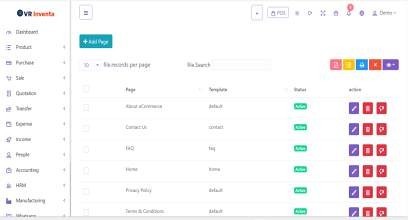
Pages Management
118 E-Commerce - Widgets
Manage Widgets for different website sections, including available widgets, section above footer, side features, and footer section. You can add, remove, or rearrange widgets as needed.
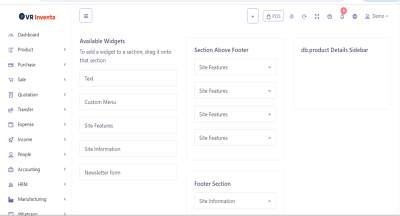
Widgets Management
119 E-Commerce - FAQ Category
In FAQ Category, view and manage FAQ categories. You can search, update, or delete categories using the Action button.
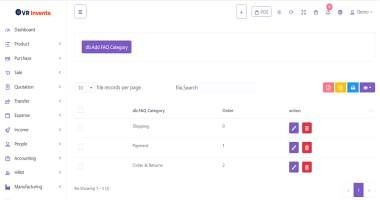
FAQ Category Management
120 E-Commerce - FAQs
Use FAQs to add new FAQs, search existing ones, and edit or delete entries as needed.
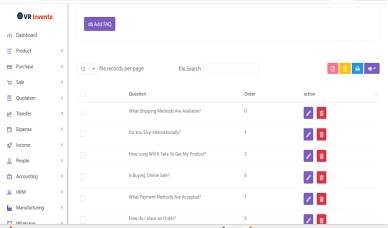
FAQs Management
121 E-Commerce - Social Links
Manage Social Links by adding, editing, or deleting links to social media accounts.
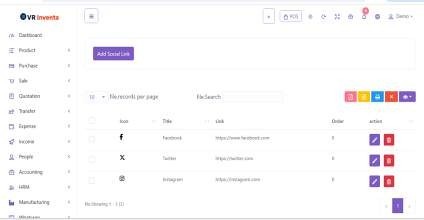
Social Links Management
122 E-Commerce - Blog
In Blog, add new blog posts, search existing posts, and edit or delete them using the Action button.
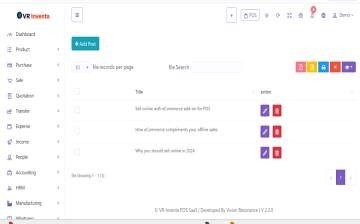
Blog Management
123 E-Commerce - E-Commerce Settings
Configure E-Commerce Settings by selecting the site logo, favicon, site title, theme, font, theme color, homepage, store phone, store email, store address, and contact form email. Upload files if needed and click Submit.

E-Commerce Settings Configuration
124 E-Commerce - Product Review
View Product Reviews submitted by customers. Use the search bar to find specific reviews and view the complete list.
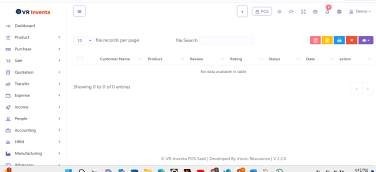
Product Review View